
Setup Fossil Repos with SCGI & Nginx
Table of Contents:
Introduction
Fossil is a distributed version control system originally designed for sqlite and tcl. I’ve been playing around with it for a couple of days and its a super interesting approach to source control. Unlike what I am used to (git), it provides a whole host of super interesting features
- local ticket tracker
- embedded documentation & wiki
- forum
Fossil is pretty much a development platform in a file. Of course, theres a caveat, its less of a joy to setup a canonical development server compared to git. In this guide I’ll walk through the process that I did to get fossil up and running on my own server.
note: this guide assumes the server is running debian 11, but the steps should work for any other distro
Local Setup
Lets get a basic fossil repository up and running to sync up with our server.
mkdir -p fossil-test/trunk
fossil new fossil-test/test.fossil
cd fossil-test/trunk
fossil open ../test.fossil
At this point you can add some files/changes to the trunk directory, when
you’re done, you can track a file with fossil add commit changes with fossil ci. Unlike git, fossil does not have a staging area, so all changes you add
will be committed, fossil add does not stage a file for commit.
Now that we got the first commit, lets do some initial web configuration before we push the fossil to a remote location.
# open your browser of choice to
# localhost:8080
fossil ui
To start, when you run the ui command, you will be logged in as a giga-super user, you’ll have all permissions to manage everything. It is highly recommended to change your password to something you can remember. When you created the initial repo, you should have been given a 10-char password1. Click ‘Logout’ to bring up the interface for password changes and logout.
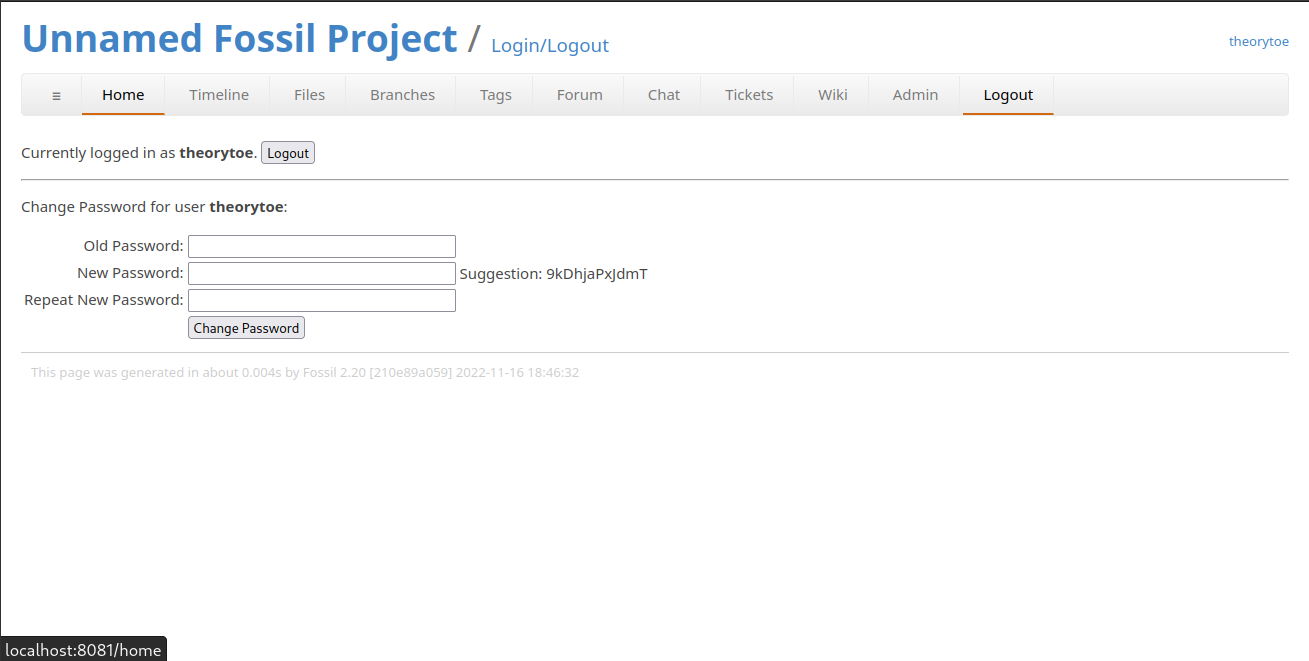
Next we can go to Admin -> Configuration to configure some information about
the repository for the web. You should make sure that the following are set
however:
- Project Name
- Server URL
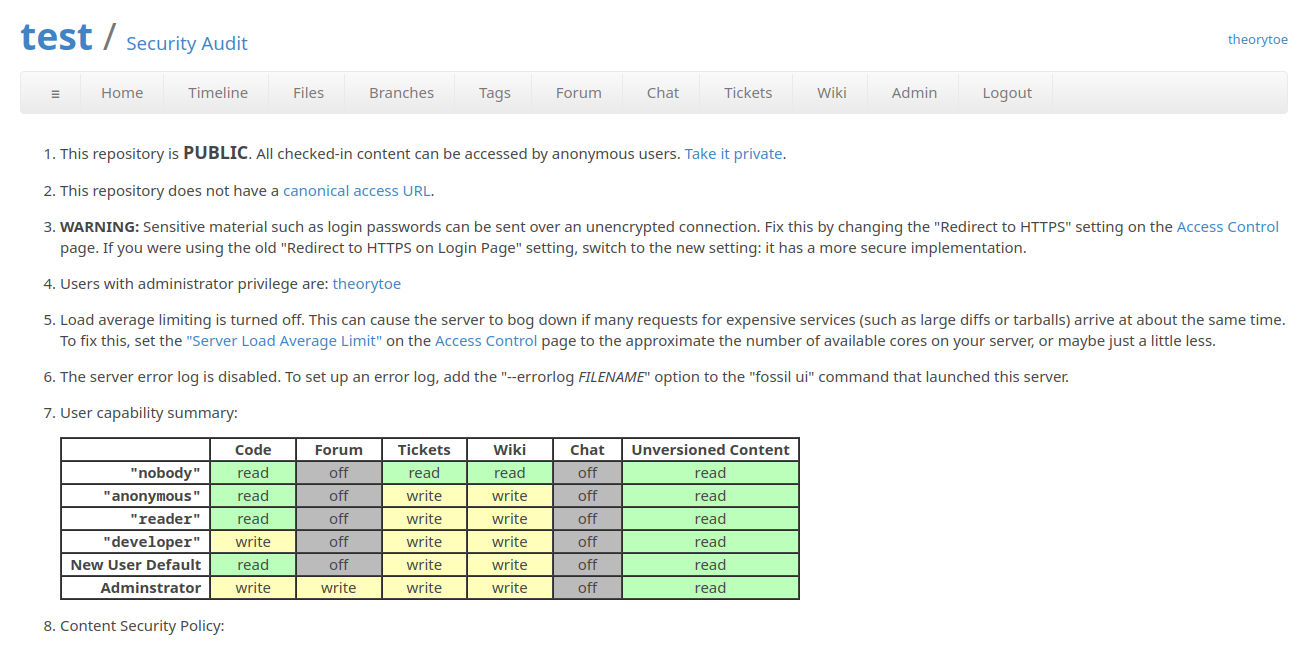
And for some final security changes, head to Admin -> Security Audit and check
everything is the way you want it.
Finally lets wrap up our changes and close the checkout:
Server Setup
Youll need both fossil and nginx installed on your server. For debian:
sudo apt install fossil nginx
We will be using scgi to serve our repos over https. Its a good idea for security reasons to create another non-root user in order to serve our content. Lets get the initial setup done:
useradd -s /bin/bash -mU fossil

# you can make this to wherever you want to store the fossils
mkdir -p /var/lib/fossil
chown fossil:fossil /var/lib/fossil
Nginx Setup
Next, lets setup nginx to serve the webui of our repos. You can place the
following nginx configuration file into /etc/nginx/sites-available/fossil.
Make sure to replace tld.example.org with the domain you want to point it to.
server {
	server_name tld.example.org;

	access_log /var/log/nginx/fossil-access.log;
	error_log /var/log/nginx/fossil-error.log;

	root /var/lib/fossil;

	location / {
		include scgi_params;
		# this script name can be chaged to anything you want
		scgi_param SCRIPT_NAME "/repos";
		# port specified in `fossil server` cmd
		scgi_pass 127.0.0.1:9000;
	}
}
Now make sure you enable the config:
ln -s /etc/nginx/sites-available/fossil /etc/nginx/sites-enabled

# or whatever command for your init
systemctl reload nginx
Fossil Daemon Setup
Finally you can run this command to serve all fossil repos in /var/lib/fossil,
note that if you want to serve just a single repository, you can substitute the
path with the path of a .fossil file and omit the --repolist flag.
fossil server /var/lib/fossil --repolist --scgi --port 9000
If you have systemd, you can make a unit file in
/etc/systemd/system/fossil.service. If you use a different init just create a
script with the command above.
[Unit]
Description=Fossil repositories with scgi

[Service]
Type=simple
User=fossil
Group=fossil
ExecStart=/usr/bin/fossil server /var/lib/fossil --scgi --repolist --port 9000

[Install]
WantedBy=multi-user.target
Enable it with
systemctl daemon-reload
systemctl enable --now fossil
Syncing the local repo
Now that everything is setup, lets upload our fossil onto the remote server. Assuming the state of the local repository is the same as we left it earlier. Ill be using rsync, but any tool should suffice.
rsync -rzvtP ../test.fossil fossil@tld.example.org:/var/lib/fossil/test.fossil
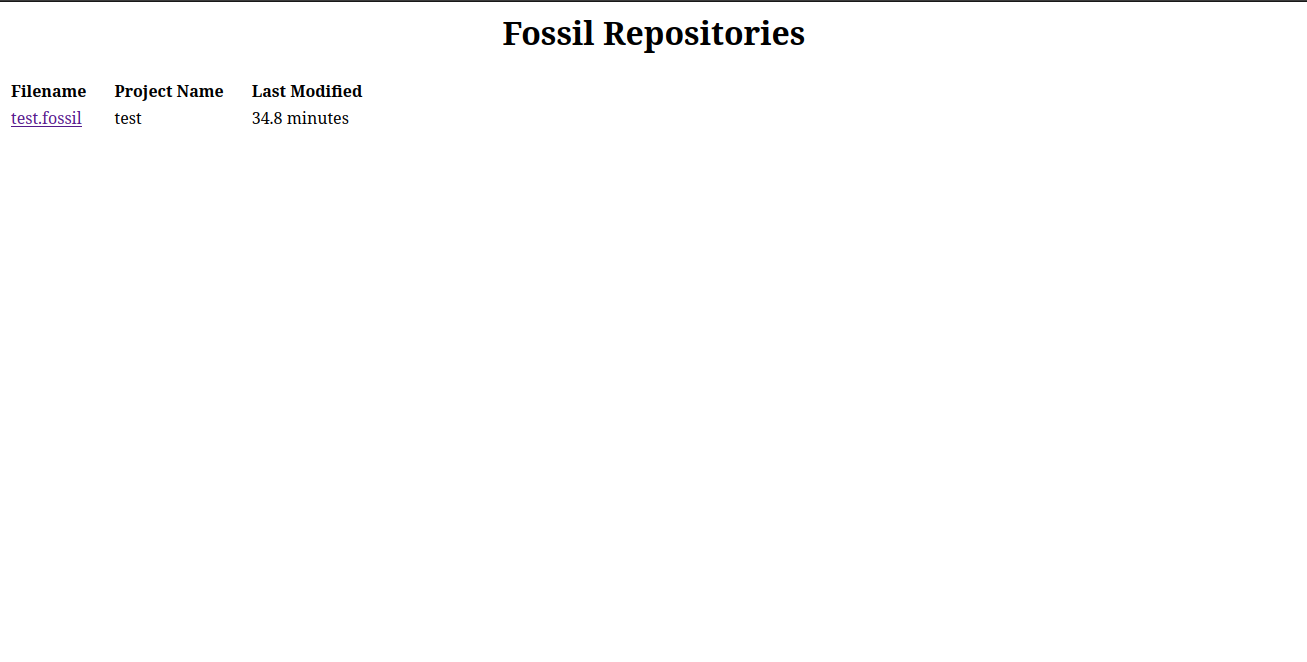
Now, you can point your browser to the domain that you configured, you should
see something similar to the following. Copy the link that points to
test.fossil.
Now its time to point our local repository to the remote repository. Lets start
by adding the remote. You must substitute <user> with the primary user and
<passwd> with the password that you configured earlier.
fossil remote add origin https://<user>:<passwd>@tld.example.org/repos/test/home
Congrats! Any changes you make locally can be synced with your remote, just use
fossil sync to push and pull changes from your remote.
Reference
Of course this guide wont cover how to actually use fossil, but I have linked below some useful documentation pages in order to get started with fossil.
-
If you lost it somehow, you can go to Admin -> Users -> your username (the unix username) to force change it without an old password. ↩︎
